Stage Synchronization
This document explains how to import Stage from external project files (*.amproj) in child projects,
or how to synchronize Stage from child projects in parent projects.
Importing Stage from External Project File in Child Project
- Select a Stage.
- Find and the Synchronize -> Import Stage From File button in the right Editable panel.
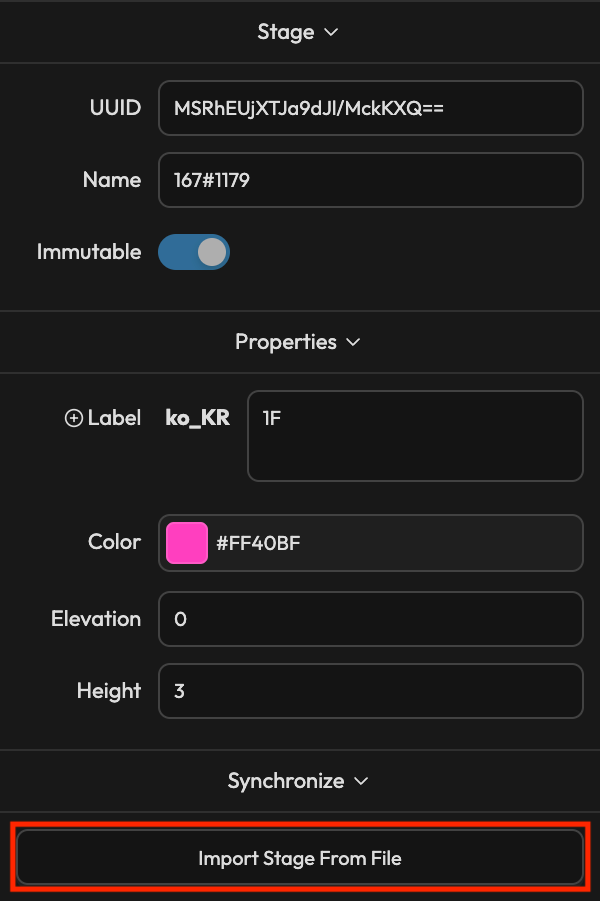
- A file explorer opens. Find and select the desired external project file (*.amproj).
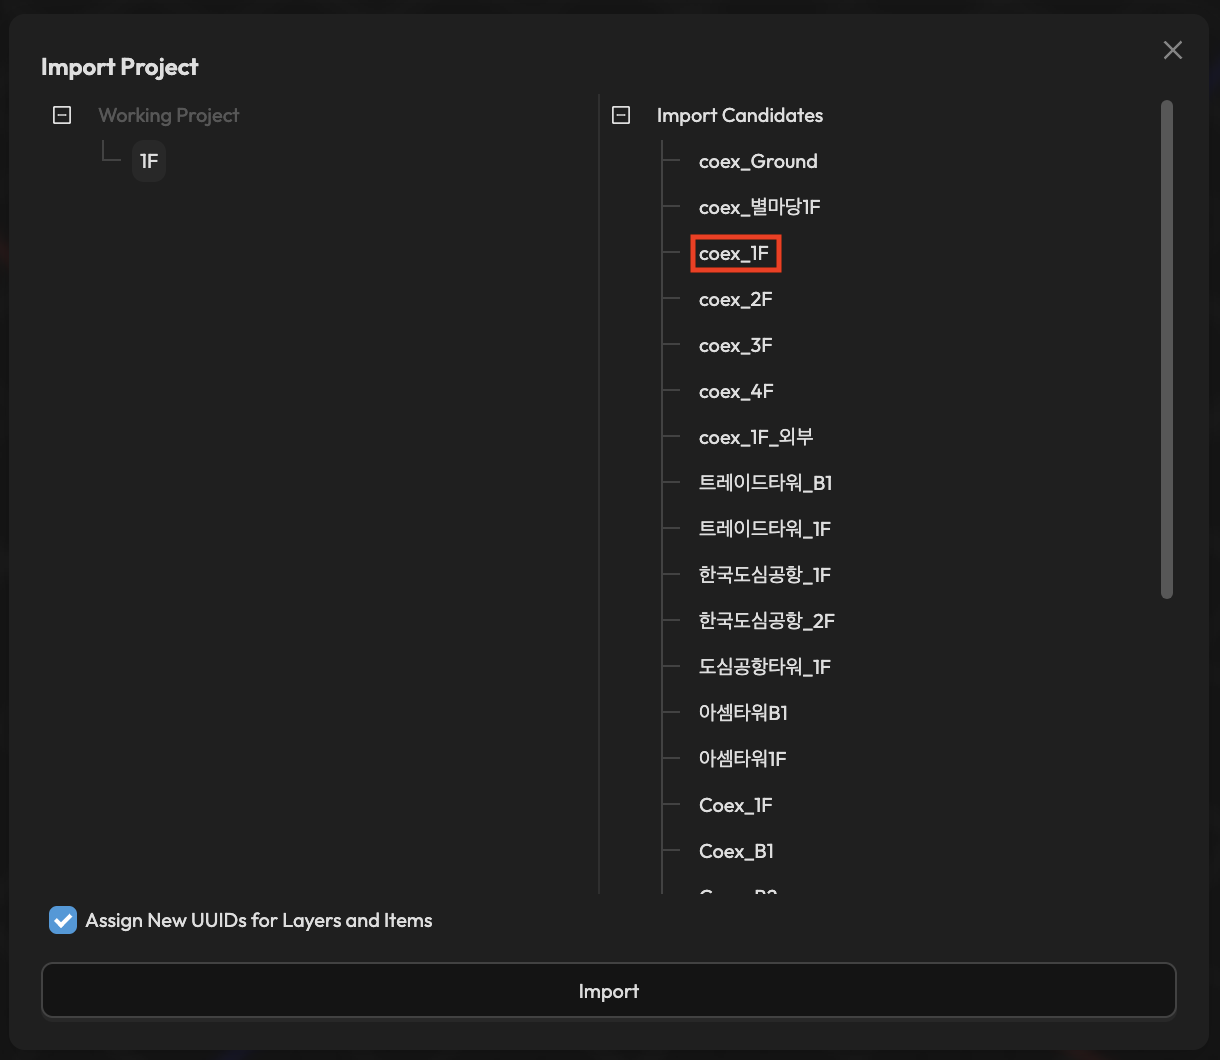
- A split modal opens. The left side shows the currently open project's structure, and the right side shows the external project file's structure in tree form.
- Select the Stage you want to import from the right tree.
- the Import button at the bottom to replace with the selected Stage.
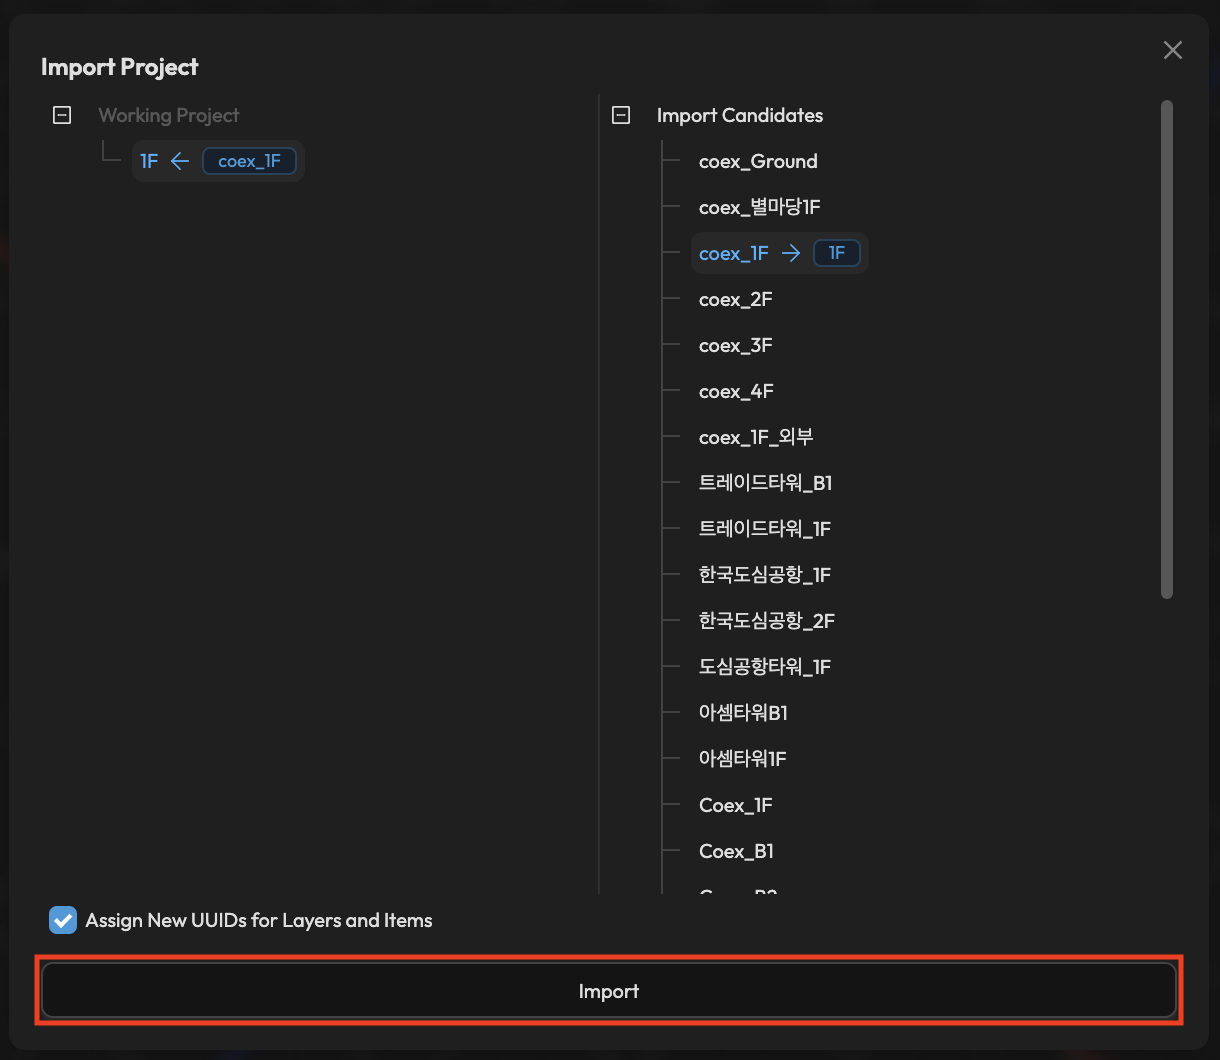
The import method is overwrite.
All existing child elements in the existing Stage are deleted and replaced with new child elements from the imported Stage.
However, the unique ID of the existing Stage is not replaced.
You can use this feature repeatedly to import all your past *.amproj work files into an AMapper For ARC eye project.
UUID Reassignment Option
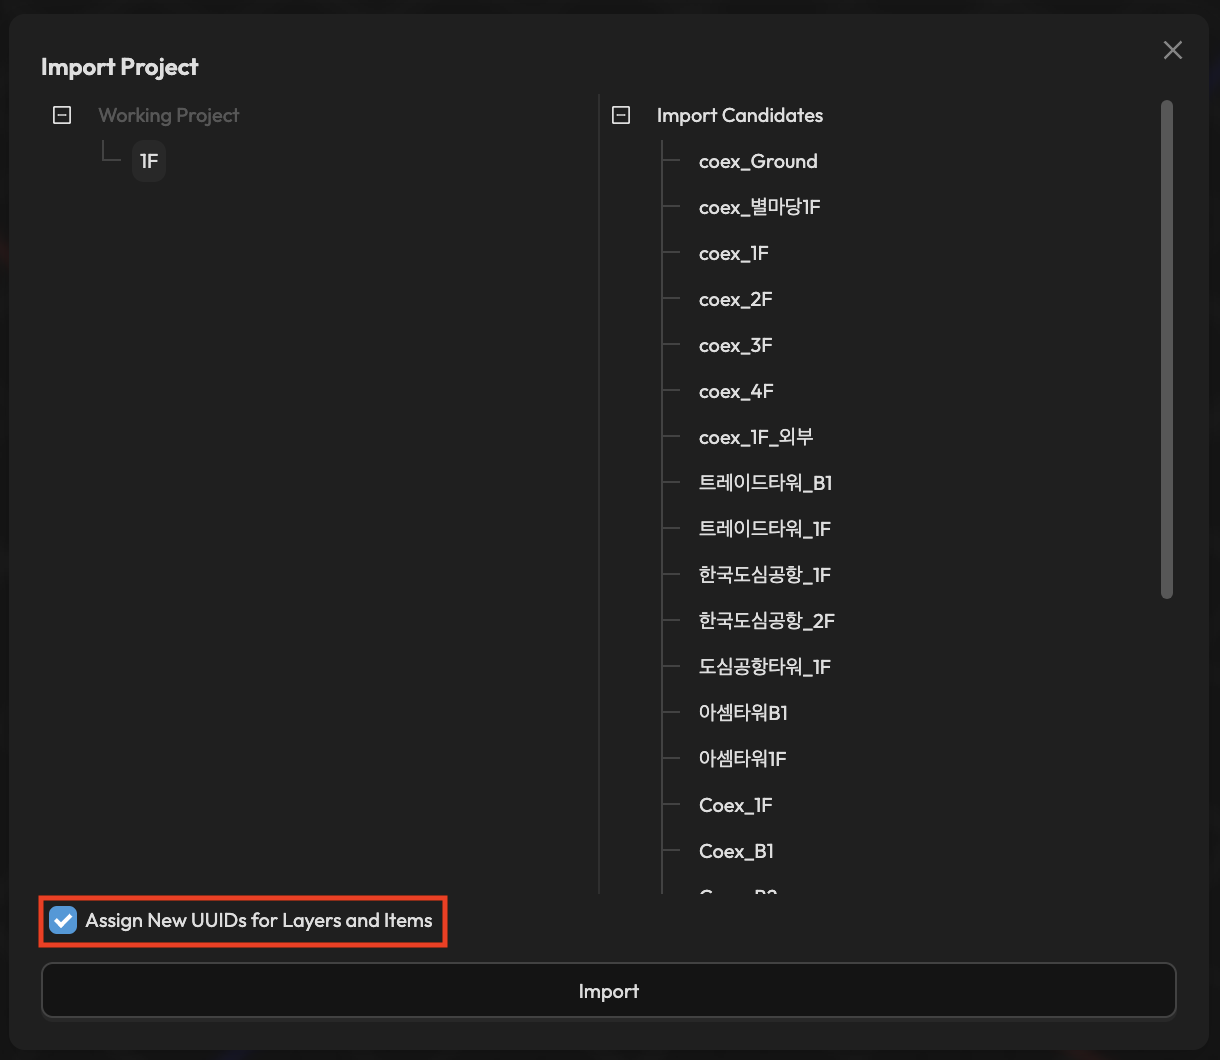
When importing, the Assign New UUIDs for Layer and Items checkbox is enabled by default.
- Enabled (default): Generates new UUIDs for imported layers and items. Positions and properties remain the same, but they are treated as separate new items.
- Disabled: Preserves the original UUIDs from the *.amproj file.
- When integrating *.amproj files completed with the desktop version into AMapper For ARC eye, keeping the original UUIDs is recommended.
- When you want to roll back a project to a previous state, importing a previously exported *.amproj file with original UUIDs maintains compatibility with the integrated project.
For example, if 8F and 9F have nearly identical structures and you export 8F to import into 9F with UUID reassignment disabled, 9F will contain items with the same UUIDs as 8F.
During integration, items with the same UUID will conflict and the project's data consistency may be corrupted.
In such cases, always import with UUID reassignment enabled (default).
Synchronizing Child Project Stage in Parent Project
- Select a Stage.
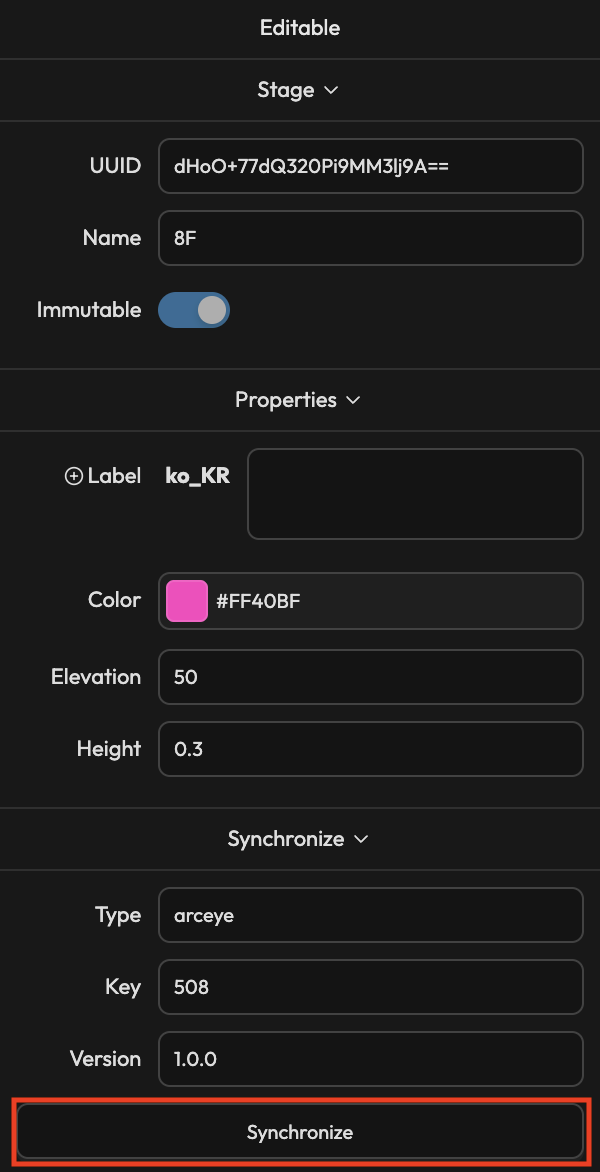
- Find and the Synchronize -> Synchronize button in the right Editable panel.
- A modal titled Synchronize Stage opens. The As-is on the left shows the name and version of the currently synchronized Stage, and the To-be on the right shows the name and version of the Stage to be newly synchronized.
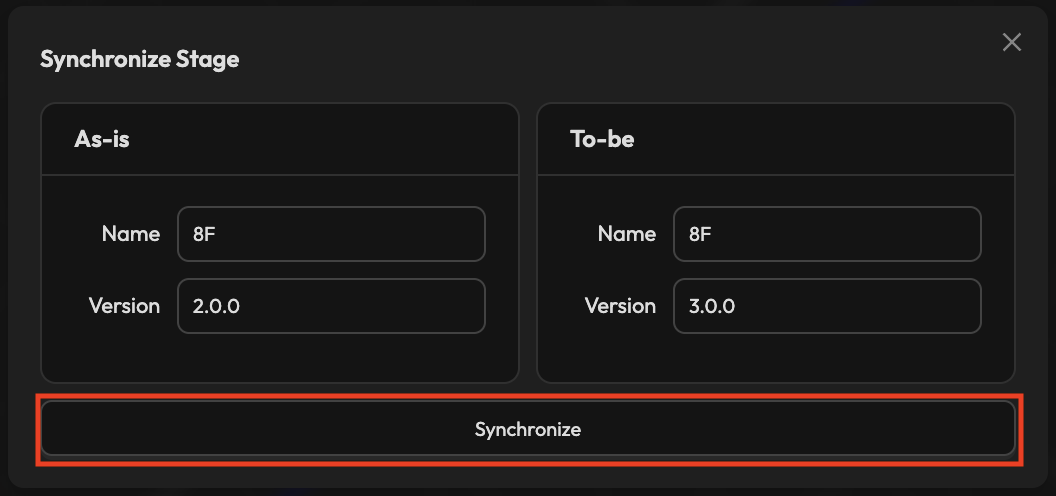
- the Synchronize button.
Synchronization also imports in an overwrite manner.
However, except for the initial synchronization, the Stage's Elevation and Height are maintained.
(Considering cases where Elevation and Height are adjusted collectively when integrating multiple child projects in a parent project)
Integrated Project Merge Synchronization Rules
When opening an integrated project, the system inspects all location projects that have been published and behaves as follows:
| Condition | Behavior |
|---|---|
| Location does not exist in the integrated project | Auto-synced to the latest published version |
| Location already exists in the integrated project | Not auto-synced (manual synchronization required) |
Locations that have already been synced were confirmed by a previous operator. New version synchronization also requires manual confirmation to prevent unintended data changes.
An integrated project with no publish history has no locations, so all locations are auto-synced to their latest versions every time it is opened. Be sure to publish the integrated project to preserve the synchronization results.
- 1F work completed → Published → 1F v2.0.0 created
- 2F work completed → Published → 2F v1.0.0 created
- Open integrated project → All locations auto-synced to latest versions (1F@v2.0.0 + 2F@v1.0.0)
- Publish integrated project → Integrated v1.0.0 created
- Current state: Integrated v1.0.0 (1F@v2.0.0 + 2F@v1.0.0)
- 1F modified and republished → 1F v3.0.0 created
- 3F newly created and published → 3F v1.0.0 created
- Open integrated project
- 1F: Already exists, not auto-synced (still 1F@v2.0.0)
- 3F: Does not exist, auto-synced to latest version (3F@v1.0.0 added)
- Select 1F Stage in hierarchy panel → Click Synchronize button in properties panel → Manually sync to 1F@v3.0.0
- Publish integrated project → Integrated v2.0.0 created (1F@v3.0.0 + 2F@v1.0.0 + 3F@v1.0.0)
Inter-Stage Connection
This is the process of connecting paths across multiple stages in an integrated project. In location-level projects, only one stage exists, so connections cannot be made.
Inter-stage connections must be completed to enable cross-stage (cross-floor) pathfinding.
Connection Method
Connect GraphNodeItem items with a Transit property set, located in different stages, using Joints.
- Set the GraphNodeItem's Transit property to Elevator, Stair, or Escalator.
- In the properties panel's Joints section, use the dropdown to select and connect a node of the same Transit type in another stage.
- The direction of connected nodes (bidirectional/unidirectional) can be changed with the direction button.
When connecting Joints, only nodes that are nearby and have the same Transit type are shown in the list.
For detailed property descriptions, see the GraphNodeItem Properties documentation.
Project Maintenance
Tenant changes, removal of temporary structures like pop-up stores, and interior remodeling can cause floor plans and POI/route data to diverge from reality.
Recommended Maintenance Method
While it is possible to directly edit and publish the integrated project, it is better for data consistency to edit and publish the relevant location project, then synchronize it to the integrated project.
- Synchronization from location project → integrated project is possible, but integrated project → location project reverse synchronization is not supported.
- As the number of locations grows, editing within a large integrated project can become burdensome. A strategy of editing individual locations separately is more efficient.
- This approach is also beneficial when multiple operators work in parallel, each responsible for different locations.